本着避免重复造轮子的原则,该教程记录了博主部分对网站的原创自定义美化魔改,同时也包括 f12 扒取其他优秀博主样式的部分。
食用教程前,建议先看一下《教程&笔记常量申明》,且所有修改对缩进格式等有严格要求。
更新日志
2022-6-30
- 优化了【首页置顶文章轮播组件】,采用模板方式调用_data 文件夹里 yaml 文件的数据
2022-3-16
- 侧边小组件——土味情话
2022-3-08
- 光标框选文字颜色
2021-8-12
- 侧边 Sticky 组件随页面上下滚动而微移的 Bug
2021-6-14
- 首页置顶文章轮播组件
2021-6-03
- 更改文章 h1~6 级标题前 icon 图标
2021-4-30
- 右下角返回顶部按钮
2021-4-28
- 深浅模式下分别使用不同网站背景
- 首页公告栏轮播组件
H1深浅模式下分别使用不同网站背景
-
修改
<BlogRoot>\themes\butterfly\_config.yml,其中background_dark参数为深色模式下的图片地址。diff
# Website Background (设置网站背景) # can set it to color or image (可設置圖片 或者 顔色) # The formal of image: url(http://xxxxxx.com/xxx.jpg) background: url(<FilePath>) +background_dark: url(<FilePath>) -
修改
<BlogRoot>\themes\butterfly\source\css\var.styl,在第 36 行左右diff
$web-bg = hexo-config('background') && unquote(hexo-config('background')) +$web-bg-dark = hexo-config('background_dark') && unquote(hexo-config('background_dark')) $index_top_img_height = hexo-config('index_top_img_height') ? convert(hexo-config('index_top_img_height')) : 100vh -
修改
<BlogRoot>\themes\butterfly\source\css\_mode\darkmode.styl,在第 41 行左右diff
+   #web_bg
+     background: $web-bg-dark
-   #web_bg:before,
    #footer:before,
    #page-header:before
      position: absolute
      width: 100%
      height: 100%
      background-color: alpha($dark-black, .7)
      content: ''
拓展:
若你想像我一样使用四方连续风格图片(seamless background)且能正常显示 repeat 效果,则继续按照下方更改
-
修改
<BlogRoot>\themes\butterfly\source\css\_global\index.styl,在第 64 行左右diff
if $web-bg
  #web_bg
-   position: fixed
+   position: absolute  //此处可控制背景是否能跟随滑轮滚动,按需选择是否更改
    z-index: -999
    width: 100%
    height: 100%
    background: $web-bg
-   background-attachment: local
-   background-position: center
-   background-size: cover
-   background-repeat: no-repeat
H1首页公告栏轮播组件
开发背景
看了洪哥的首页哔哔轮播组件,心里痒痒的想整,奈何自己早已转战 leancloud 版哔哔,于是看着月益增多的公告栏突然灵机一动,寻思着把每一条公告通过轮播组件来实现会不会更好,而且右侧组件又可以腾个位置了,于是开始一天摸鱼的行动,终于扒完了。
来康康我删前的右侧公告栏 👇,太占面积了,加了滚动条还是觉得长,而且信息不容易被访客捕捉到
预览效果

-
修改
<BlogRoot>\themes\butterfly\_config.yml(可以忽略,貌似不加也行)diff
inject: head: + # 公告栏轮播组件 + - <link rel="stylesheet" href="https://unpkg.com/swiper/swiper-bundle.min.css" media="defer""> bottom: -
新建
<BlogRoot>\themes\butterfly\layout\includes\notice.pugjade
#notice.notice(onclick=`pjax.loadUrl('/notice/')`)
    i.notice-logo.fas.fa-bullhorn.card-announcement-animation
    span=' '+_p('公告栏')
    #noticeList.swiper-container
        .swiper-wrapper
            .swiper-slide <Custom>
            .swiper-slide <Custom>
            .swiper-slide <Custom>
    i.notice-enter.fas.fa-arrow-circle-right
.js-pjax
  script(src='https://unpkg.com/swiper/swiper-bundle.min.js' data-pjax='')
  script.
    var swiper = new Swiper ('#noticeList', {
      spaceBetween: 30,
      centeredSlides: true,
      direction: 'vertical', // 垂直切换选项
      loop: true, // 循环模式选项

      autoplay: {
        delay: 3000,
        disableOnInteraction: false,
      },
    })
.swiper-slide <Custom>这里可以写你的公告内容 -
新建
<BlogRoot>\source\notice\index.md,也可以通过在命令行里敲hexo new page <Custom>markdown
--- title: 公告栏 - Notice date: 2021-04-27 16:09:00 description: 与本站和博主相关的公告 aside: false --- [这里可以写你的公告] -
修改
<BlogRoot>\themes\butterfly\layout\index.pugdiff
extends includes/layout.pug block content include ./includes/mixins/post-ui.pug #recent-posts.recent-posts if theme.gitcalendar.enable .recent-post-item(style='width:100%;height:7.5% !important;overflow:hidden;') !=partial('includes/gitcalendar', {}, {cache: true}) + include includes/notice.pug +postUI include includes/pagination.pug注意:如果你使用了 GitCalendar,可能会出现大小失常,建议
height:15%改成height:7.5%,具体情况自行调整 -
在
<Custom>.css里添加以下代码css
.notice-logo {
  line-height: 22px;
  margin-right: 8px;
  transition: 0.3s;
}
#notice {
  height: 47px;
  background-color: white;
  color: var(--font-color);
  margin-top: 20px;
  padding: 12px 20px 10px 20px;
  border-radius: 10px;
  cursor: pointer;
  display: flex;
  overflow: hidden;
}
[data-theme="dark"] #notice {
  background: black !important;
}
#notice span {
  white-space: nowrap;
}
.swiper-wrapper {
  width: 100%;
  height: 25px;
  line-height: 25px;
}
.swiper-wrapper .swiper-slide {
  width: 100%;
  text-align: center;
  -webkit-line-clamp: 1;
  -webkit-box-orient: vertical;
  overflow: hidden;
  text-overflow: ellipsis;
  transition: 0.3s;
  font-weight: bold;
}
.swiper-slide:hover {
  color: #1fc7b6;
}
#noticeList {
  margin-left: auto;
  margin-right: auto;
  position: relative;
  overflow: hidden;
  list-style: none;
  padding: 0;
  z-index: 1;
}
.notice-enter {
  line-height: 25px;
  margin-left: 8px;
  transition: 0.3s;
}
使用场景:公告栏可以写与博客网站相关的重要事件,也可以写与博主有关的公告申明。
缺点:每次更新公告要在
index.md和notice.pug俩文件里进行手动增删改,当然你也可以选择不建index.md,少费点事,访客只看看就行,不需要点进去看完整公告,然后适当自定义修改notice.pug即可。我个人觉得公告栏不用像哔哔那样需频繁更新,所以这算不上是麻烦。2021.5.25:我意外看到realwds前端大佬也写了篇公告栏教程,好巧,他的教程是采用模板形式,只用在 md 文档中写时间和公告消息,首页前端就能获取到文本并显示出来,正好解决了我教程的缺点,友友们按需选择教程。
H1右下角返回顶部按钮
效果请看网页右下角
-
修改
<BlogRoot>\themes\butterfly\_config.ymldiff
inject: head: # - <link rel="stylesheet" href="/xxx.css"> bottom: + # 返回顶部按钮 + - <div id="doraemon_to_top"><img alt="doraemon_to_top" onclick="fly_to_top()" src="<FilePath_图片>"></div>src这里添加图片地址 -
在
<Custom>.css里添加以下代码css
@media screen and (min-width: 768px) { #doraemon_to_top { position: fixed; z-index: 1001; right: 30px; transition: 0.3s; opacity: 0; bottom: -187px; transform: scale(1); } #doraemon_to_top.doraemon_fixed { bottom: -51px; opacity: 1; cursor: pointer; } #doraemon_to_top.doraemon_fixed:hover { transform: scale(0.95); } } -
在
<Custom>.js里添加以下代码js
function fly_to_top() { btf.scrollToDest(0, 500); } window.addEventListener("scroll", function (event) { var scrollTop = document.documentElement.scrollTop || window.pageYOffset || document.body.scrollTop; if (scrollTop > 56) { document .getElementById("doraemon_to_top") .classList.add("doraemon_fixed"); } else { document .getElementById("doraemon_to_top") .classList.remove("doraemon_fixed"); } }); -
最后把 butterfly 自带的返回顶部按钮给去掉,提供俩思路,
留作课后作业display: none;- 获取类名/id 名,定位到 pug 源码,注释或删除相应代码
注意:img 标签内所有参数值以及 css 代码里的值都可以自定义更改,前后保持一致就行。
JS 代码参考教程:晴明的博客园
H1更改文章 h1~6 级标题前 icon 图标
开发背景
灵感来源于eurkon。单靠肉眼识别字体大小来判断标题等级不是件容易的事情,若 h1~6 标题使用不同图标的话,那么识别会容易许多。
小插曲:我之前在此问题上花了很多功夫,比如加大各等级标题字体大小之间的差值(肉眼还是难以分别)、更换颜色(确实好分辨,但主色过多不符合我对网站视觉美感的要求)、部分标题加不同样式的左边框(还是不太符合视觉美感要求,不够直观)
- 在
<Custom>.css里添加以下代码
css
#article-container h1:before {
  content: "<Custom>";
}
/* h2~6以此类推 */
其中
<Custom>部分可以填写一下内容:
H¹、H²、H³、H⁴、H⁵、H⁶
H₁、H₂、H₃、H₄、H₅、H₆
H1、H2、H3、H4、H5、H6
fontawesome的 icon 图标代号(例如
'\f06c')可以加阿里图标(在此鸣谢Venkiˡᵒᵛᵉ💕 留言)
css
#article-container h1:before {
  font-family: "iconfont";
  content: "<Custom>"; /*阿里图标的Unicode*/
}
- Hexo 三连即可看到效果
H1首页置顶文章轮播组件
开发背景
每次打开自己博客,前 5 排都是置顶文章,同时右侧小组件中的“最新文章”早已被我换成了更新时间排序,所以一定程度上访客难以快速定位到最新发布的文章。把置顶文章用轮播图的形式表现出来,既美观又能腾出部分展示空间给最新发布的文章。
预览效果
-
新建
<BlogRoot>\themes\butterfly\layout\includes\sticky.pugpython
link(rel='stylesheet' href='https://unpkg.com/swiper/swiper-bundle.min.css') //- style(type='text/css'). #sticky #stickyList.swiper-container .swiper-wrapper each i in site.data.sticky .swiper-slide.harris-border(onclick=`pjax.loadUrl('` + i.link + `')`) .grid-img img.cover.entered.loaded(alt=i.title src=i.cover) .grid-title div= i.title //- 分页器 .swiper-pagination .js-pjax script(src='https://unpkg.com/swiper/swiper-bundle.min.js') script. var mySwiper = new Swiper('#stickyList', { initialSlide: Math.round(Math.random()*5 + 1),// 初始化滑块索引(1到6随机数) direction: 'horizontal',// 垂直切换选项 speed: 600, // 切换速度 loop: true, // 循环模式选项 slidesPerView: 2, // 显示2个滑块 centeredSlides: true, // 选中滑块居中 effect : 'coverflow', slidesPerView: 2, coverflowEffect: { rotate: 20, // 滑块做3d旋转时Y轴的旋转角度 stretch: 0, // 每个滑块之间的拉伸值,越大滑块靠得越紧 depth: 80, // 滑块的位置深度。值越大z轴距离越远,看起来越小 modifier: 2, // depth和rotate和stretch的倍率,值越大这三个参数的效果越明显 slideShadows : false // 是否开启slide阴影 }, loopAdditionalSlides: 0, loopPreventsSlide: false, // 滑块过渡时,允许切换过渡方向 autoplay: true, // 自动滑动 autoplay: { disableOnInteraction: false, // 滑块触碰后不会停止自动切换 pauseOnMouseEnter: true, // 鼠标置于swiper时暂停自动切换 }, mousewheel: true, // 鼠标滚轮控制滑块切换 // 如果需要分页器 pagination: { el: '.swiper-pagination', clickable :true, // 点击分页器的指示点分页器会控制滑块切换 // 自定义分页器的指示点 renderBullet: function (index, className) { return '<span class="' + className + '">' + (index + 1) + '</span>'; }, }, }) -
在
<BlogRoot>\source\_data里新建sticky.yml。这是文章模板,放 4-6 篇文章为佳。yaml
#- cover: 封面图片链接 # link: 置顶文章链接,站内文章建议填相对链接 # title: 置顶文章标题 - cover: https://cdn.jsdelivr.net/npm/hassan-assets/img/cover_butterfly_beautify.png link: /posts/9d49f75f title: Butterfly主题美化魔改集锦 - cover: https://cdn.jsdelivr.net/npm/hassan-assets/img/top_image.jpg link: /posts/223fd004 title: 博客食用须知! -
修改
<BlogRoot>\themes\butterfly\layout\index.pugdiff
include ./includes/mixins/post-ui.pug #recent-posts.recent-posts if theme.gitcalendar.enable .recent-post-item(style='width:100%;height:8% !important;overflow:hidden;') !=partial('includes/gitcalendar', {}, {cache: true}) + include includes/sticky.pug -
在
<Custom>.css里添加以下代码css
#sticky { height: 384px !important; width: calc(100% - 20px); } .swiper-container#stickyList { width: 100%; height: 360px; bottom: -6px; overflow: hidden; } #stickyList .swiper-slide { width: calc((100% - 20px) / 2) !important; height: 270px; top: 6px; margin: 0 5px 10px; background: var(--harris-card-bg); position: relative; border-radius: 12px; transition: 0.3s; } #stickyList .swiper-slide .grid-img { overflow: hidden; height: 11rem; } #stickyList .swiper-slide .grid-img img { transition: 0.3s; object-fit: cover; display: block; width: 100%; height: 100%; } #stickyList .swiper-slide:hover .grid-img img { transform: scale(1.1); } #stickyList .swiper-slide .grid-title { margin: 12px 0; font-size: 20px; transition: 0.3s; font-weight: normal; } @media screen and (min-width: 768px) { #stickyList .swiper-slide .grid-title { white-space: nowrap; overflow: hidden; text-overflow: ellipsis; } } #stickyList .swiper-slide:hover .grid-title { color: var(--harris-theme-color); } .swiper-pagination-bullet { width: 26px !important; height: 26px !important; line-height: 26px; color: var(--harris-black); background: var(--harris-blue-lighter) !important; opacity: 1 !important; } .swiper-pagination-bullet-active { color: var(--harris-white); background: var(--harris-theme-color-dark) !important; } @media screen and (max-width: 768px) { #recent-posts #sticky { width: 100%; height: 14rem !important; } .swiper-container#stickyList { bottom: 0; } #stickyList .swiper-slide { height: 110px; top: 12px; } #stickyList .swiper-slide .grid-img { height: 7rem; } #stickyList .swiper-slide .grid-title { font-size: 16px; font-weight: normal; } } -
Hexo 三连即可看到效果
注意:写该教程时,我只是将我目前轮播组件使用的 CSS 代码进行了简单适配更改,但未经测试,所以样式 CSS 代码可能存在问题,
再一次给友友们提供锻炼 CSS 调试能力的机会,同时sticky.pug中的 JS 参数可以自行调整,更多参数的详细释义可以参考Swiper API 文档。
拓展:
该轮播组件不只是可以放置顶文章,还可以放些其它功能页面,甚至站外链接也行。
若你的有一定前端能力,还可以进一步更改源码做到在文章
front-matter里添加参数,即可将其显示在首页置顶文章轮播组件中。
H1侧边 Sticky 组件随页面上下滚动而微移的 Bug
前提:贵站的导航栏已经魔改成固定 fixed 样式。细心的友友应该能发现,看文章时,随着滚轮上下移动,侧边目录组件有 50px 的上下移动距离,其实这不算是 Bug,Jerry 这么写只是为了右侧组件配合导航栏移动而移动。所以现在咋们魔改党要固定它!
-
修改
<BlogRoot>\themes\butterfly\source\css\_layout\head.styl,在 178 行左右diff
- & + .layout - & > .aside-content > .sticky_layout - top: 70px - transition: top .5s .apple #page-header.full_page background-attachment: scroll !important -
修改
<BlogRoot>\themes\butterfly\source\css\_layout\aside.styl,在 106 行左右diff
.sticky_layout +minWidth900() position: sticky position: -webkit-sticky - top: 20px + top: 70px transition: top .3s -
Hexo 三连即可看到效果
H1光标框选文字颜色
-
在
<Custom>.css里添加以下代码css
/* webkit, opera, IE9 */ ::selection { background: #3f3f3f; color: #fff; } /* mozilla firefox */ ::-moz-selection { background: #3f3f3f; color: #fff; }如果想跟随深浅模式更改颜色,则继续添加如下代码:
css
[data-theme="dark"] ::-moz-selection { background: #f0f0f0; color: #000; } [data-theme="dark"] ::selection { background: #f0f0f0; color: #000; } -
修改
<BlogRoot>\themes\butterfly\source\css\_global\index.styl,在第 195 行左右,将其注释或删除stylus
// *::selection
//   background: $theme-text-selection-color
//   color: #F7F7F7
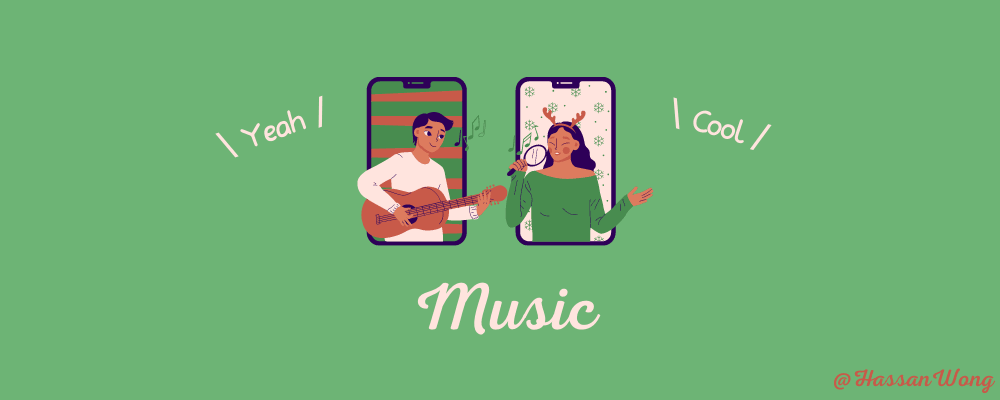
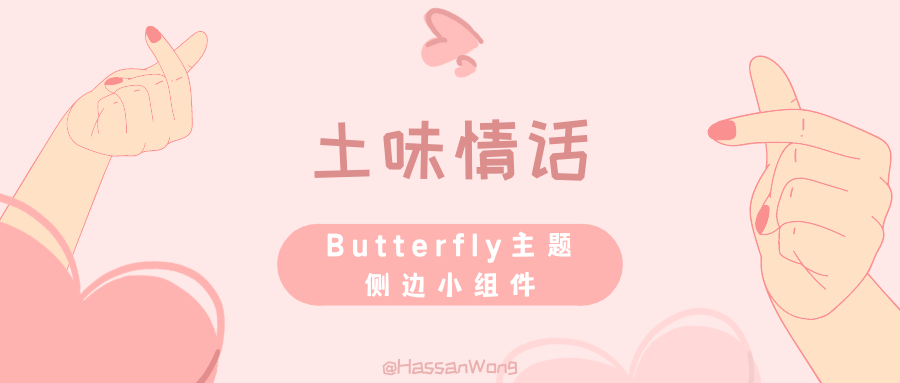
H1侧边小组件——土味情话
结束语:
若是有疑问或更好的解决方法欢迎留言。若想 get 本篇未记录的同款,请先查看更新手账,手账记录了本站 2021-01-23 以来几乎所有美化魔改微调的更新历史,且参考过他人的更新都附带有教程链接。若更新手账未记录,那么请自行
F12